Third-party entities go out of their way to collect data from you. In your web browser they use tracking cookies extensively and nearly every browser on the market goes to great lengths to offer tools and features to protect you from the collection of that data.
But did you know there’s a really sneaky way to collect your data from within an email client? The method in question uses invisible pixels (called tracking pixels) in an email to not only help a company see which emails you interact with but how you interact with them.
What are tracking pixels?
A tracking pixel is a 1px by 1px square image that is created from a simple line of code, inserted into a message and is invisible to users because they are usually transparent and located somewhere innocuous (such as the header or footer of the email).
These pixels help companies (especially marketing firms) measure open/click rates, discover traffic sources, track conversions, and gather other data points. Specifically, tracking pixels empower companies with the following types of information:
-
How many people open emails and click-through links.
-
Provide a general success rate of an email campaign.
-
Devices used to read email.
-
Which email providers a recipient uses.
-
What region a recipient is located in.
Sounds like something many privacy-conscious users don’t want or need. Fortunately, some email client developers are catching on to this tactic and have made it possible to protect yourself against them. One such client is Apple Mail.
Let me show you how to enable that protection, so you can avoid the dreaded tracking pixel.
How to block tracking pixels
I’m demonstrating with Apple Mail 15.0. This new feature is built into macOS Monterey, so if you’re using an older version of macOS, you’ll want to upgrade as soon as possible (which you should do anyway).
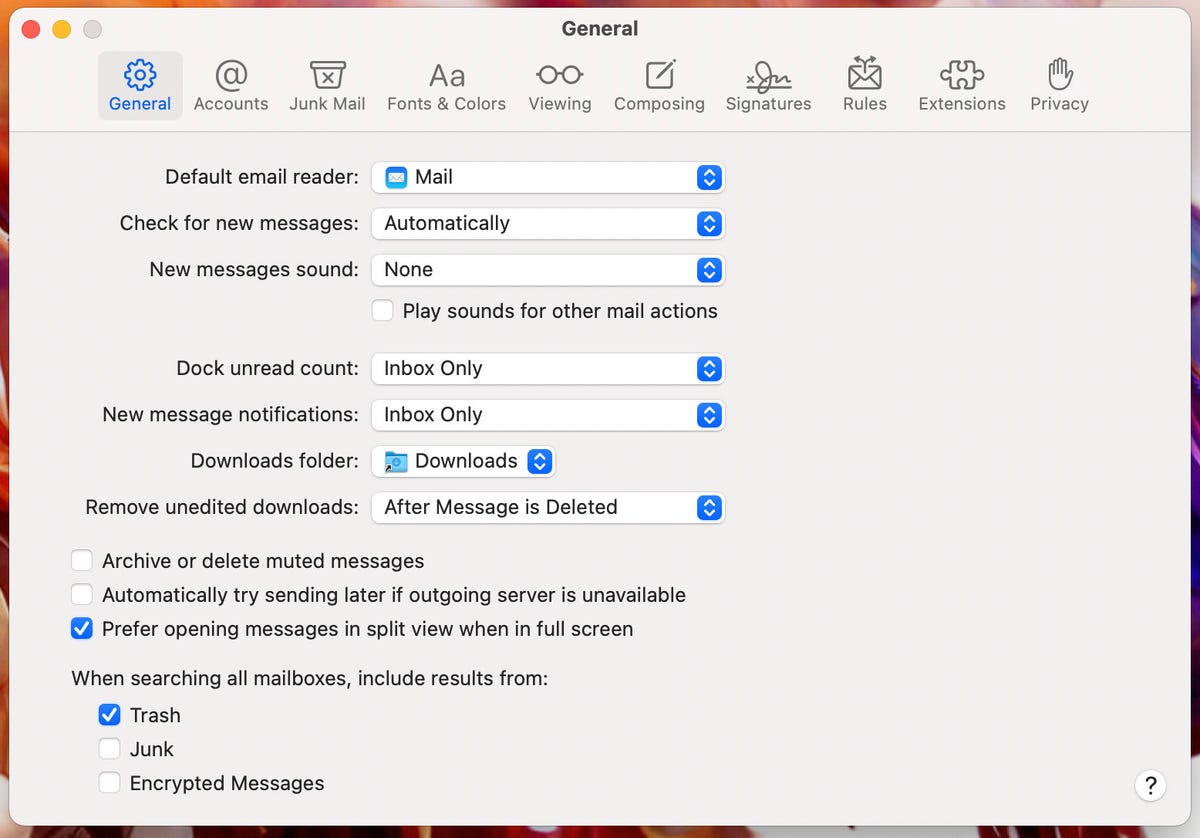
To enable tracking pixel protection, open Apple Mail and click Mail > Preferences. Click the Privacy tab in the menu bar (Figure A).
Figure A

The Apple Mail Preferences window gives you quick access to a number of important configuration options.
In the resulting window (Figure B), click the check box associated with Protect Mail Activity.
Figure B

Protecting yourself from tracking pixels is but a check box away.
When you enable the feature, you’ll notice that Hide IP Address and Block All Remote Content both are greyed out. That doesn’t mean those features will be disabled but if want to enable either of those options, do so before clicking Protect Mail Activity.
There’s no need to restart Apple Mail, as the change will take effect immediately.
With this option enabled, you no longer have to worry about tracking pixels collecting your data that can, in turn, be used by companies in the same way tracking cookies are used within a web browser.
Welcome to a more private email experience in macOS.


